Category Archives: Appetizers

Make-Your-Own Mountain Pies

Today’s post is not a recipe, but an idea that I’m so excited to share. Fall is the perfect time to have a make-your-own mountain pie get-together!

To start, for those who don’t know what mountain pies are, they are basically pressed sandwiches that are made over a fire. I grew up eating mountain pies, but recently realized that there are lots of people who don’t know what they are. All that you need to make them is your favorite sandwich ingredients, a fire and a mountain pie maker – which are inexpensive and easy to come by.

I grew up eating super traditional mountain pies – it was either pizza (tomato sauce, cheese, pepperoni) or dessert (canned pie filling). Not that there’s anything wrong with those traditional combos, but a couple of years ago, we started having ‘gourmet’ mountain pie parties at my parents house, and my mountain pie experience will never be the same. Instead of sticking to those traditional ingredients, my mom and I prepared a ton of different ingredients, then laid everything out so that it was a make-your-own mountain pie bar. We’ve had these get-togethers several times over the last few years, and although it can be a lot of work (especially for a big group of people), it is always so fun and so delicious. I thought I’d share the idea today, as well as some ingredient ideas and some of our favorite ‘gourmet’ mountain pie combinations!

The key to a make-your-own mountain pie bar is to have a wide variety of ingredients in a few categories of foods – you need a variety of meats, vegetables, cheeses, sauces/condiments and ‘extras.’ It’s nice to have all of the ingredients prepped and in small bowls/containers and then laid out on a table next to the fire. It can take some time and can be a bit of work, but if you set aside enough time, it can be a lot of fun to get everything ready. One other note – the type of bread that you use does make a difference. Use a high quality bread of your choice for the best results. The last time Greg and I made mountain pies, we used homemade sourdough from a local bakery (Gettysburg Baking Company!), and it was amazing.

Here are some mountain pie ingredient ideas:

Meats: pulled chicken or pork, ground beef, bacon, smoked salmon, ham
Vegetables: onions (raw or caramelized), peppers, tomatoes, mushrooms, broccoli, spinach
Fruits: peaches, apples, berries, bananas
Cheese: cheddar, swiss, provolone, goat cheese, mozzarella, feta, cream cheese, gouda, parmesan
Sauces/condiments: mustard, pesto, barbecue sauce, hot sauce, tomato sauce, peanut butter, salad dressings, salsa
Extras: capers, olives, banana peppers, artichokes, saurkraut, fresh herbs (basil, thyme, rosemary), chocolate, marshmallows, nuts (like pecans, walnuts, peanuts), brown sugar, fruit jam, lemon curd

And some combination ideas:

Savory:
Bacon, peach, goat cheese (herbs would be good on this too)
Tomato, caramelized onion, olive, caper, mozzarella
Chicken, caramelized onion, saurkraut and cheddar
Chicken, banana peppers, cream cheese, cheddar cheese, hot sauce
Ground beef, mushrooms, banana peppers, tomato sauce, mozzarella, parmesan
Chicken, mushroom, pesto, gouda
Ham, broccoli, mustard, gouda
Smoked salmon, tomato, capers, cream cheese
Pulled pork, onions, peppers, barbecue sauce, provolone
Ham, apple, mustard, cheddar
Chicken, salsa, cheddar
Spinach, caramelized onion, artichoke, parmesan, feta

Sweet:
Cream cheese, berries, brown sugar
Banana, peanut butter, chocolate
Marshmallow, chocolate, banana, peanuts
Cream cheese, peaches, pecans, brown sugar
Cream cheese, lemon curd
Peanut butter, jam, peanuts

So, that’s it! The mountain pie filling ideas are endless, so pick your favorite foods and try it out. Honestly, the craziest combinations are usually the tastiest mountain pies! Another key when you have a big group of people is to have the bread pre-buttered. That way, each person can just grab their bread, place it buttered side down in the mountain pie maker, top it as they please and then put it in the fire until pressed and toasted.

This post has me craving another make-your-own mountain pie night! If you have any awesome mountain pie combination ideas, or any questions about the process, let me know in the comments below!

Peach + Blueberry Pico de Gallo

This is a dish that Greg and I make frequently. We stand together, each chopping away at a vegetable or fruit, and create this bowl of beautiful tastes and colors. We top it onto chips as we make the rest of our meal, and then we enjoy it as a topping on veggie or fish tacos. Every single time we make this, we each take our first crunchy bite and declare it as our favorite food ever. And every single time we make this, we get into a conversation about just how good real food tastes and how lucky we are to eat food this good and healthy for us. I hope we do that forever.

We are lucky to eat food this good, especially this time of the year, using seasonal and local ingredients. For this batch of pico, we brought home most ingredients from Three Springs Fruit Farm and we’ve actually made it twice this week. Once for fish tacos and another time, sweet potato tacos. 

With just nine total ingredients, this dish is so easy to prepare and is also so versatile. The base of tomato, red onion, jalapeno and cilantro works so well for switching up the fruit seasonally. We often make it with mango and have done it with just peach, too. But for this batch I added blueberries and loved it. This pico adds just the right freshness, crunch and sweetness to a taco and is great with just chips, too. 

The color, smell and taste of this is truly special and I have a hard time believing that you wouldn’t declare this as your favorite food ever on your first bite either. Make it while we are lucky enough to have fresh summer fruits and veggies, enjoy every bite, and be reminded of just how good real food tastes!

1-2

4-2

7-2

8-2

9-2

10-2

11-2

14-2

15-2

Peach + Blueberry Pico de Gallo
Write a review
Print
Ingredients
  1. 1 generous cup cherry or grape tomatoes
  2. 1 large peach
  3. 1/2 cup fresh blueberries
  4. 1 small red onion (or about 1/2 cup)
  5. 1 small jalapeno
  6. Handful of fresh cilantro
  7. 1 tablespoon olive oil
  8. 1/4 teaspoon salt
  9. 1/4 teaspoon pepper
Instructions
  1. Evenly dice the tomatoes and peach. Finely dice the onion and jalapeno. Roughly chop the cilantro. Combine everything in a bowl, along with the whole blueberries, with olive oil, salt and pepper and stir until combined. Taste and adjust seasoning as desired.
Notes
  1. *My tomatoes were multi-colored mini heirlooms but any cherry or grape tomato will work fine.
  2. * I used a yellow peach but a white one would work great as well.
The Dreaming Foodie https://www.thedreamingfoodie.com/

Creamy Vegan Herbed Hemp Dip

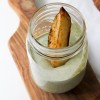
How are you? It’s been awhile since I’ve last shared with you, but I’m back today with a recipe that I’m thrilled with. And, today’s recipe – creamy vegan! herbed hemp dip goes perfectly with the everyday oven fries I shared with you two weeks ago!

This dip (or spread) is inspired and heavily adapted from Edible Perspective’s Hemp Seed Dressing recipe. I saw Ashley’s recipe and immediately fell in love. Who knew that blending hemp seeds creates a creamy base perfect for making dressings, dips and spreads! This is it. This will be the base to any creamy dip or dressing I need in the future. Thank you Edible Perspective!

Today’s recipe is my ode to french fries dipped in ranch dressing, a lifelong favorite of mine. I’ve kind of stopped wanting to eat ranch dressing in the last few years though, due to its long and unnatural list of ingredients. I’ve tried my hand at homemade ranch dressing using things like sour cream and mayo, but am always disappointed when I have a ton of those ingredients leftover with no use for them.

While this recipe does not taste like an exact replica of the ranch we’re all used to, it’s a substitute that I’m actually even happier with. It tastes herb-y and delicious, makes a great dip and spread, and it uses real, natural ingredients that I keep on hand. This hemp seed dressing solves all my french fry + ranch problems and is to me, life changing.

It also goes great with fresh veggies, spread on sandwiches or drizzled in wraps!

7-2

3-2

4-2

10-2

5-2

12-2

Creamy Vegan Herbed Hemp Dip
Write a review
Print
For the dip/dressing
  1. 1/3 cup water
  2. Juice from 1 lemon (or lime)
  3. 2 tablespoons olive oil
  4. 1/2 tablespoon pure maple syrup
  5. 1/2 cup hemp seeds
  6. 2 medium garlic cloves
  7. 1/2 teaspoon salt
  8. 3/4 teaspoon black pepper
  9. 1/2 teaspoon onion powder
  10. Small pinch of paprika
  11. Small drizzle Worcestershire (optional)
  12. Handful fresh dill
  13. Handful fresh chives
Instructions
  1. Place all ingredients, except fresh herbs, into a blender. Blend on low speed for ~30 seconds, or until smooth and creamy. Scrape down sides of blender, add fresh herbs* and blend for an additional 30 seconds, or until fully incorporated.
  2. Enjoy as a dip, dressing or spread!
Notes
  1. Recipe inspired and heavily adapted from Edible Perspective's Hemp Seed Dressing (link in post).
  2. *Some people prefer a more subtle herb taste, so start with a small amount of fresh herbs and add more as desired.
The Dreaming Foodie https://www.thedreamingfoodie.com/

Everyday Oven Fries

Dreaming Foodie readers, let me introduce you to one of my all-time favorite side dishes. One that Greg and I consume multiple times, every single week. One that we never get sick of and that is always as good as the last time. Healthy, oven-baked french fries. Fries that you can feel good about eating all the time!

This recipe has been years in the making. I have been trying for so long to get the right recipe for homemade fries, made in the oven, and this is it. This will be it for me, forever and ever. For a basic, everyday oven fry recipe, this one wins for me in texture, taste and technique. These fries are crispy on the outside and soft on the inside. They taste salty and peppery and have a gentle kick from a touch of paprika. They are simple to make, with just a handful of ingredients and a bit of preparation. You need to try these fries – you will love them!

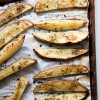
First let’s talk texture. These fries get their crispiness from a quick boil before they are baked. I simply cut up the potatoes, place them in a large pot with water, bring it to a boil and boil for just 5 minutes. This exact method evolved from many other methods I’ve tried over the years. This is the one that works for me and that I’ll continue to do. It’s easy and takes very little time. The 5-minute boil is imperative to this exact recipe. I made many fries in the past that I did not boil and they have not come out as well or nearly as crispy. The boiling changes everything.

The taste of these fries is incredible. I took everything I like about different fries and put them into one. They are salty (who doesn’t love salty fries?), they are peppery, a tiny bit garlic-y and onion-y (from garlic powder and onion powder), a tiny bit spicy (from paprika) and herb-y (from parsley). This is a combination that I just love – nothing fancy or exotic, just yummy basic fries, made with ingredients that are always stocked in my pantry. 

The technique is simple. Cut potatoes, boil, drain + rinse, brush with olive oil + sprinkle with seasoning, bake 40-45 minutes. It’s that easy. I show in two photos below how I cut my potatoes. I used to cut oven fries thin, but found out that thin fries will break with the boiling step. For this recipe, the fries need to be sliced thick, like very large steak fries. They need to be able to withstand the boiling. From start to finish, the fries will shrink, so if you think they look large once they are cut, don’t worry, you won’t think that once you are eating a crispy, delicious fry! 

A few more notes on this recipe – for Greg and I, I usually use 3-4 medium to large russet potatoes. That makes a ton of fries – two full baking sheets, so for lighter eaters, I would plan for 1 medium-large potato per person. They do make good leftovers, and are awesome reheated in the oven. The seasoning amounts I provide will be good for 3-4 medium-large potatoes. If you’re feeding a crowd, double or triple the amounts as needed!

1-2

2-2

4-2

5-2

12-2

11-2

6-2

10-2

7-2

Everyday Oven Fries
Write a review
Print
Ingredients
  1. 3-4 medium potatoes (I like russet)
  2. 1/2 teaspoon salt
  3. 1/2 teaspoon black pepper
  4. 1/2 teaspoon onion powder
  5. 1/4 teaspoon garlic salt or powder
  6. 1/4 teaspoon paprika
  7. 1 heaping teaspoon dried parsley
  8. 2 tablespoons olive oil
Instructions
  1. Preheat oven to 400*.
  2. Line two baking sheets with parchment paper.
  3. In a small bowl, mix together all spices. Set aside.
  4. Rinse potatoes. Cut into very thick slices. I usually get 10-12 slices, or fries, per potato.
  5. Place sliced potatoes into large pot and fill with water. Bring to a boil. Boil exactly 5 minutes.
  6. Drain and rinse with cold water. Let potatoes cool slightly, just to the point that you can easily handle them.
  7. Arrange evenly on baking sheets, so that no potatoes are touching.
  8. Brush lightly with olive oil and sprinkle evenly with spice mix.
  9. Bake for 40-45 minutes in oven, or until crispy and golden brown.
  10. Enjoy!
Notes
  1. 3-4 medium to large potatoes with make two full baking sheets of fries. As part of a meal, I would plan for 1 large potato per person.
The Dreaming Foodie https://www.thedreamingfoodie.com/

Favorite Hummus

I’m sharing with you today my absolute favorite hummus recipe – homemade, simple, uncomplicated and tahini-free!

I don’t like buying things that I don’t use often. I will occasionally buy a special ingredient for a special recipe, but for everyday food, I use what’s already in my pantry + some fresh fruits and veggies. That has always been my hummus dilemma. I don’t want to buy tahini, but I read everywhere that the key to creamy, yummy hummus is tahini. So I bought it once and it took up room in my fridge and the only thing I used it for was hummus and I’m just not happy with things like that. If you are like me, and want a seriously uncomplicated, tahini-free hummus, this is the recipe for you!

With six total ingredients (all things that I always have on hand) and just a tiny bit of time, you can have delicious, filling, simplified hummus!

I make this all the time and don’t vary it. When it comes to hummus, I truly do just enjoy it simple, not complicated and not fancy. Just some chickpeas, lemon, olive oil, garlic, salt and pepper. That’s it. To me, that’s all it needs. This version is creamy, lemony and wonderful served with crackers, toasted bread or fresh veggies. This hummus is great to whip up for a snack, to take to a party or to enjoy it as we did just last night, as a spread on sandwiches.

If you try it and you love, let me know. Leave a comment on this post, on Facebook or Twitter!

1-2

2-2

3-2

4-2

5-2

7-2

6-2

Favorite Hummus
Write a review
Print
Ingredients
  1. 1 15-ounce can chickpeas
  2. Juice from 1/2 of a lemon (or about 2 tablespoons)
  3. 2 medium garlic cloves
  4. 1/2 teaspoon black pepper
  5. 1/4 teaspoon salt
  6. 3-4 tablespoons olive oil
Instructions
  1. Drain but don't rinse the chickpeas (see notes below).
  2. Add the chickpeas, lemon juice, garlic cloves, pepper and salt to a food processor. Process for about one minute, or until mixture has turned into a smooth paste.
  3. Turn off the food processor, scrape down the sides and turn it back on, drizzling in the olive oil a little at a time, until hummus has reached your desired smoothness and consistency.
  4. Taste and add more lemon juice, garlic, pepper and/or salt to your taste.
Notes
  1. I drain, but don't rinse my chickpeas. The brand I use has no salt added so I don't feel the need to rinse them. If your canned chickpeas have salt added, rinse them if you are worried about excess salt, or don't rinse them and don't add any extra salt to the hummus.
  2. If you are sensitive to lemon or garlic tastes, start with less of each and add more as you choose.
The Dreaming Foodie https://www.thedreamingfoodie.com/