Tag Archives: Homemade

Grain Free Apple Cobbler Cake

I wasn’t sure what to call this dessert. My intent was to make a healthified apple cobbler. It came out more like a cake – but yet not really like a cake. So it’s an apple dessert. A grain free, maple sweetened apple dessert. This recipe uses minimal, whole ingredients. It uses: almond flour, eggs, pure maple syrup, coconut oil, some salt, vanilla extract, lemon juice, baking powder, and apples. That’s it. It’s simple to put together and we have been loving it as a weeknight dessert or snack.

This apple cobbler cake has an incredibly moist and dense crumb. It is perfectly sweetened and the touch of lemon juice comes through pleasantly. The apples soften just right – they’re soft and pillowy yet still hold some crunch. You can eat this while it’s still warm, but I wouldn’t recommend it – it falls apart a bit when it’s still warm. It’s texture becomes amazing once completely cooled and that is how we’ve preferred to enjoy it.

Something to note. I absolutely love this dessert. It’s delicious and it makes you feel good + nourished after eating it. That being said, if you’re looking for a decadent, indulgent fall dessert, this is not what you’re looking for. This is for anyone who wants a dessert that’s grain free and naturally sweetened. We haven’t always eaten grain free and I don’t know that we always will, but right now that’s what we’re going with. As far as sugar, I’m doing all of my baking these days with either pure maple syrup, honey or dates. I love classic homemade desserts using all out sugar and flour, but this just isn’t that. This is whole food nourishment that tastes like dessert and I am loving it :).


Grain Free Apple Cobbler Cake

Ingredients

  • 2 medium apples, sliced
  • 2 cups almond flour
  • 1 teaspoon baking powder
  • 1/2 teaspoon salt
  • 1/2 cup coconut oil, melted and cooled
  • 1/2 cup pure maple syrup
  • 2 eggs
  • 2 teaspoons vanilla extract
  • 2 tablespoons fresh lemon juice

Instructions

  1. Preheat oven to 350 degrees. Prepare an 8 or 9 inch baking dish by rubbing it with a bit of coconut oil.

  2. Layer most of the sliced apples on the bottom of the baking dish, saving a few apple slices for the top, if desired. Set aside.

  3. In a small bowl, mix together almond flour, baking powder and salt. Set aside.

  4. In a medium bowl, whisk together the coconut oil and maple syrup. Add the eggs, vanilla extract and lemon juice and whisk until well combined.

  5. Add the dry ingredients to the wet and mix until just combined. Pour batter into baking dish, covering the sliced apples. Top with remaining sliced apples.

  6. Bake for about 35 minutes, or until an inserted toothpick comes out clean. Let cool completely before cutting and eating.


Make-Your-Own Mountain Pies

Today’s post is not a recipe, but an idea that I’m so excited to share. Fall is the perfect time to have a make-your-own mountain pie get-together!

To start, for those who don’t know what mountain pies are, they are basically pressed sandwiches that are made over a fire. I grew up eating mountain pies, but recently realized that there are lots of people who don’t know what they are. All that you need to make them is your favorite sandwich ingredients, a fire and a mountain pie maker – which are inexpensive and easy to come by.

I grew up eating super traditional mountain pies – it was either pizza (tomato sauce, cheese, pepperoni) or dessert (canned pie filling). Not that there’s anything wrong with those traditional combos, but a couple of years ago, we started having ‘gourmet’ mountain pie parties at my parents house, and my mountain pie experience will never be the same. Instead of sticking to those traditional ingredients, my mom and I prepared a ton of different ingredients, then laid everything out so that it was a make-your-own mountain pie bar. We’ve had these get-togethers several times over the last few years, and although it can be a lot of work (especially for a big group of people), it is always so fun and so delicious. I thought I’d share the idea today, as well as some ingredient ideas and some of our favorite ‘gourmet’ mountain pie combinations!

The key to a make-your-own mountain pie bar is to have a wide variety of ingredients in a few categories of foods – you need a variety of meats, vegetables, cheeses, sauces/condiments and ‘extras.’ It’s nice to have all of the ingredients prepped and in small bowls/containers and then laid out on a table next to the fire. It can take some time and can be a bit of work, but if you set aside enough time, it can be a lot of fun to get everything ready. One other note – the type of bread that you use does make a difference. Use a high quality bread of your choice for the best results. The last time Greg and I made mountain pies, we used homemade sourdough from a local bakery (Gettysburg Baking Company!), and it was amazing.

Here are some mountain pie ingredient ideas:

Meats: pulled chicken or pork, ground beef, bacon, smoked salmon, ham
Vegetables: onions (raw or caramelized), peppers, tomatoes, mushrooms, broccoli, spinach
Fruits: peaches, apples, berries, bananas
Cheese: cheddar, swiss, provolone, goat cheese, mozzarella, feta, cream cheese, gouda, parmesan
Sauces/condiments: mustard, pesto, barbecue sauce, hot sauce, tomato sauce, peanut butter, salad dressings, salsa
Extras: capers, olives, banana peppers, artichokes, saurkraut, fresh herbs (basil, thyme, rosemary), chocolate, marshmallows, nuts (like pecans, walnuts, peanuts), brown sugar, fruit jam, lemon curd

And some combination ideas:

Savory:
Bacon, peach, goat cheese (herbs would be good on this too)
Tomato, caramelized onion, olive, caper, mozzarella
Chicken, caramelized onion, saurkraut and cheddar
Chicken, banana peppers, cream cheese, cheddar cheese, hot sauce
Ground beef, mushrooms, banana peppers, tomato sauce, mozzarella, parmesan
Chicken, mushroom, pesto, gouda
Ham, broccoli, mustard, gouda
Smoked salmon, tomato, capers, cream cheese
Pulled pork, onions, peppers, barbecue sauce, provolone
Ham, apple, mustard, cheddar
Chicken, salsa, cheddar
Spinach, caramelized onion, artichoke, parmesan, feta

Sweet:
Cream cheese, berries, brown sugar
Banana, peanut butter, chocolate
Marshmallow, chocolate, banana, peanuts
Cream cheese, peaches, pecans, brown sugar
Cream cheese, lemon curd
Peanut butter, jam, peanuts

So, that’s it! The mountain pie filling ideas are endless, so pick your favorite foods and try it out. Honestly, the craziest combinations are usually the tastiest mountain pies! Another key when you have a big group of people is to have the bread pre-buttered. That way, each person can just grab their bread, place it buttered side down in the mountain pie maker, top it as they please and then put it in the fire until pressed and toasted.

This post has me craving another make-your-own mountain pie night! If you have any awesome mountain pie combination ideas, or any questions about the process, let me know in the comments below!

Stuffed Sweet Potatoes

The meal I’m sharing today is definitely not the prettiest meal, but it was the tastiest new meal that we’ve made in a while. And, it’s super simple, healthy, satisfying and is definitely going to be added to our weeknight meal rotation. There are three parts to this meal: the sweet potato, the protein and the toppings (guac!). Here are the details:

Sweet potatoes:
I roast sweet potatoes weekly and here’s how I do it: wash the sweet potatoes, prick them all over with a fork, wrap tightly in aluminum foil, place in the oven (450°) and bake until soft – usually 45 minutes to an hour, depending on their size. 

Protein:
For this particular meal, I used ground pork (that I buy locally!). I cooked it in a skillet with the green chile sauce pictured below. The flavor of the pork on its own was actually kind of subtle – it did just a have bit of spice to it – but was excellent in the dish as a whole. You could really use any protein you wanted in this recipe – meat or plant-based. I think almost anything would work!

Guacamole:
I love making gauc and usually do it the same every time. For this batch, I used three avocados, the juice of two limes, and a generous pinch of salt and pepper. I blend everything together until very smooth in my Ninja.

Tomatoes:
I mixed cherry tomatoes with a touch of avocado oil, fresh cilantro, salt and pepper. Simple and delicious.

Putting the meal together is so simple: Split open the sweet potato and fill with your protein of choice. Top with lots (and lots) of guacamole, tomatoes and a sprinkle of fresh cilantro, and enjoy!

This meal was not photogenic, so I didn’t include many photos, but it was oh so nourishing and tasty.

*Note about the green chile sauce I use in this recipe – I am all about making things from scratch, but there are a few things that I will buy already made – things like the green chile sauce I used in this recipe. I am super picky about buying packaged goods, and the green chile sauce that I bought from Wegman’s passed my test. It was made with minimal ingredients and they were all whole, real ingredients that I would have used at home.

Summer Cooking Inspiration – Herbed Zucchini Noodles with Grilled Shrimp and Tomatoes

In an effort to share more of what we love and what we cook, here is the first in hopefully a little series of summer cooking inspiration posts.

These posts will serve as just that – inspiration. I won’t have exact recipes of what we made – I will just share photos of the process and notes of what we did in hopes that it inspires you to cook something that makes you happy.

This one was a perfect summertime meal – zucchini noodles with grilled shrimp and tomatoes. We cooked this meal on our charcoal grill and enjoyed every moment of a perfect not-quite-summer evening.

Here’s what we did:

Zucchini noodles:
We spiralized 3 large zucchinis and tossed them generously with olive oil, salt and pepper. We actually cooked these on the grill, in our vegetable grate, and it worked so well. We cooked them, tossing often, for about ten minutes. Right before we pulled them off the grill, we added minced garlic and freshly chopped herbs. We used herbs from our garden – basil and rosemary. Once off the grill, we mixed in fresh lemon juice.

Shrimp and tomatoes:
We skewered the shrimp and tomatoes separately. To season, we mixed minced garlic, salt, pepper, olive oil and a ton of fresh lemon zest. We brushed this on both the tomatoes and shrimp before going onto the grill, and then again once we flipped them on the grill. We cooked the tomatoes until the were slightly blistered, and they were just perfect in this dish.

The dinner:
For putting the meal together, we just topped the zucchini noodles with the grilled shrimp and tomatoes. We didn’t do this, but thought that it would also be great topped with a bit of fresh Parmesan cheese.

One thing we would change next time is adding a bit more seasoning to the zucchini noodles. We’d probably add more salt, pepper and herbs, lemon juice and maybe a pinch of red pepper flakes. 

Our favorite part of the meal was the marinade/seasoning mix we made for the shrimp and tomatoes. The combo of olive oil, minced garlic, lemon zest, salt and pepper was so, so delicious and the flavor really came through nicely in the dish. We will be making that again to put on many things. I think the key was using a lot of lemon zest – I used the zest from one large and thoroughly zested lemon.

Take a look:

IMG_0654IMG_0670IMG_0725IMG_0741IMG_0747IMG_0765

Almond + Peanut Butter Energy Bites

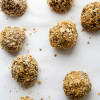
Hi everyone! It’s been awhile. I’m back today with a little recipe that has become a recent love of mine. Nothing fancy, nothing complicated, but special anyway. Almond + peanut butter energy bites. Let’s talk about ’em.

I have been making + loving these little energy bites for months and it has just now occurred to me to share them with you. Last week while I was rolling a batch out, I thought, I should share these on the blog. I know that there are many, many “energy bite” recipes out there and that this one isn’t anything revolutionary, but after many experiments in different flavor/ingredient combos, this is the one that I have come to know and love and it makes me happy to share it with you today.

Here is why I love these:

1) I haven’t had to buy granola bars in the store. And that makes me so happy. Since I have been eating these, granola bars from the grocery store just won’t do the trick. 2) They satisfy a sweet tooth craving. I have had a major sweets craving lately. Like, I never want to pass up dessert. And guess what, these satisfy that craving perfectly. 3) Not only do they healthfully satisfy my sweets cravings, they are filling. Whenever I am feeling drained in the afternoon and lunch is long past and dinner is far away, these save me. They fill me up until dinner and give me the evening energy that I need. Love it. 4) I know every ingredient. No mystery ingredients here. Also – every ingredient is one that I keep on hand and every ingredient is one that is good for me. Can’t get much better than that!

If you are looking for something to replace store bought granola bars, or looking for a snack that is super healthy + filling, please make these energy bites. This little snack has brought me much happiness and I know that it can do the same for you!

11-2

10-2

9-2

12-2

15-2

13-2

14-2

*Recipe inspired and adapted from How Sweet Eats — click link to view her recipe.

Almond + Peanut Butter Energy Bites
Write a review
Print
Ingredients
  1. 1 cup peanut butter
  2. 2/3 cup honey
  3. 1 teaspoon almond extract
  4. 2 cups rolled oats
  5. 1/2 cup sliced almonds
  6. 1/2 cup ground flax
  7. 1/4 cup chia seeds
  8. 1/4 teaspoon salt
  9. 1/4 teaspoon cinnamon
  10. Extra almonds or peanuts, finely crushed, for rolling, if desired
Instructions
  1. In a medium bowl, combine the peanut butter and honey. Microwave for 15 seconds, then stir well to combine. Add the almond extract and lightly stir. Set aside.
  2. In a large bowl, combine the oats, sliced almonds, ground flax, chia seeds, salt and cinnamon. Stir well to combine.
  3. Add the peanut butter mixture to the dry oat mixture and stir well to combine all ingredients. Mixture should be wet + slightly sticky. If it seems overly sticky and won't roll into balls, add more oats.
  4. Using your hands, form the mixture into balls, rolling each ball in crushed almonds or peanuts, if desired.
  5. Enjoy!
Notes
  1. For best results, store in the refrigerator and serve cold. They can be stored/eaten at room temperature, although they will be much softer. I highly prefer them right out of the fridge.
  2. This recipe yields 15-20 energy bites, depending on the size you make them.
  3. I prefer to roll the bites in crushed almonds over crushed peanuts - just a personal preference. Use a food processor to finely crush the nuts.
The Dreaming Foodie https://www.thedreamingfoodie.com/